You may have some music on Windows Media Player, and you want to add them into iTunes library for your new iPod or iPhone. Or you may want to move your iTunes bough music to Windows Media Player for portable devices such as Zen, Zune, Phone, Sansa, Archos, MP3/MP4 Player, etc. It’s easy to do that. And this guide will show the steps to do the job.
Part 1. Transfer Windows Media Player music to iTunes
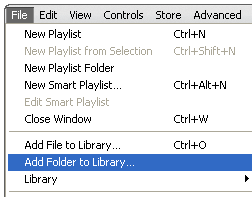
Step 1. Open iTunes and select the File — Add Folder to Library menu.
Step 2. Browse to your Windows Media Player music folder. iTunes will ask you where your songs are located, which by default will be in your My Music folder on Windows XP, or in your Music folder on Vista.

Step 3. Convert Windows Media Player songs to AAC format (.m4a). If you have files in WMA format, you will be prompted to convert those WMA files to AAC. This is a necessary step if you want those tracks available to play on your iPod or iPhone. If you have a large music library in WMA format, converting WMA to AAC may take a long time. Plan to do this at a time when you can leave your computer on and walk away to do something else for awhile. You can also import your WMA files as MP3 instead, which also allows them to work with your iPod, but makes them more portable if you buy something else in the future.

iTunes doesn’t modify your original music files from Windows Media Player. It leaves those songs in their original location and makes copies in your iTunes music folder.
Part 2. Transfer iTunes music to Windows Media Player
Because iTunes music has DRM protection, you can’t easily import the music into Windows Media Player by drag and drop.
There are two ways to transfer protected music from iTunes to Windows Media Player.
Method 1. You can use iTunes to burn the music to a blank CD at first, then use Windows Media Player to rip the music CD, the DRM protection will be remove during the ripping process, then you can rip the CD into WMP library. This way is good for tranferring a few music. For large mount of music, it would take a really long time to transfer music.

Method 2. If you don’t have blank CD disk or you have many iTunes music need to transferred to windows media player. You can use DRM Media Converter. It can legally convert the protected iTunes music to non-protected MP3 music, then you can easily drag and drop the MP3 music into Windows Media Player. It also works for the purchased iTunes music video and movie.

Step 1. Download and install the DRM Media Converter, the file size is about 13 MB. I have scaned it with Norton Virus protector and AVG spayware protector, it’s safe without any warning.
Step 2. Run the DRM Media Converter, Click Add to import iTunes music, which by default will be in My Music\iTunes\iTunes Music .Or you can run iTunes, click Edit — Advanced Tab, there you will see where your iTunes media folder location.

Step 3. Set the output audio format as ‘MP3 – MPEG Layer-3 Audio (*.mp3)‘

If you convert iTunes DRM protected file, please pay attention to the notice below.

Step 4. Click Start to run the conversion, it will take a little bit time to finish the job, then click Browse to located your converted mp3 files, drag them into Windows Media Player, done.